MAKING THE HELMET
01
VISUALISATION

The astronaut helmet was a key focus of the film. Designed to mimic real NASA helmets, its mechanics work like the real thing, with a freely rotating visor. Initially created digitally, it was then built physically, blending digital design with practical engineering for realism.
02
PRINTING
The digital model was imported into the Anycubic Photon Workshop software and sliced into layers compatible with the Resin Anycubic Photon M3 Max printer, which has a build volume of 300 x 298 x 164 mm.
The printer was set up with the appropriate resin and leveled for accurate printing. The sliced model was uploaded, and the printer used UV light to cure the resin layer by layer, gradually building the helmet components with precise details.
Once printing was complete, the helmet components were carefully removed from the build plate and washed in isopropyl alcohol to remove any uncured resin. It was then placed in a UV curing station to fully harden the resin, ensuring durability.

03
ASSEMBLY AND PAINTING
At the start, car body filler was used to smooth over any joint lines and defects in the printed model. The helmet's surface was sanded using various grits of sandpaper to further smooth imperfections, then thoroughly cleaned to remove dust.
Next, a resin-specific primer was applied to enhance paint adhesion and reveal any remaining flaws. Once dry, a base coat was evenly applied using an airbrush. Details were carefully painted using fine brushes and masking tape for precision. Finally, a clear sealant was applied to protect the finish.


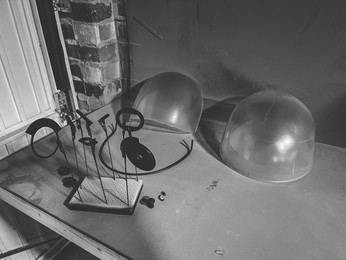


IMAGE GALLERY
The Helmet was integral to the short film, demanding several days to achieve its near-final form. Opting for clear resin for the visor extended production time, offering less forgiveness compared to vacuum forming. However, the increased thickness of the visor and its internal reflections added a crucial layer of realism and durability. The meticulous attention to detail in the mechanics on the sides and the array of small screws became standout features, ensuring authenticity across numerous visible shots.


MAKING THE SUIT
01
BODY
We embarked on the challenge of designing and constructing our own Space Suit due to a lack of high-quality options available for rent, which often fell short of our expectations.
NASA spacesuits typically have multiple layers (around 14 to 22 in total) consisting of various materials for thermal protection, pressure containment, micrometeoroid resistance, and moisture absorption, tailored to ensure astronaut safety and comfort in space missions.
Fabric selection was crucial to replicate the weight, draping, and multi-layered appearance of original suits. Some sections of our suit required up to 8 layers of fabric to achieve the desired authenticity.




02
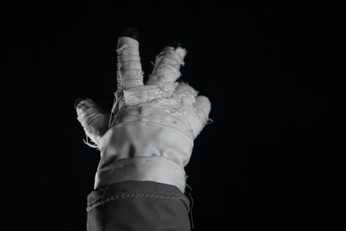
GLOVES
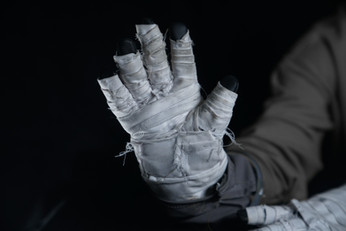
The gloves were a focal point in the film, constructed by machine stitching layers and then hand sewing them onto an existing deconstructed glove to achieve the correct shape and structure.
Inspired by NASA's approach, we used a combination of cotton canvas and rubber nylon fabrics to integrate the arm with the glove, mirroring the multi-layered design principles seen in astronaut gloves.
Additionally, a 3D-modeled glove fixture was printed and meticulously hand-sewn onto the glove to ensure a seamless connection at the arm's end.






03
BOOTS
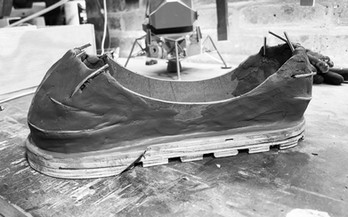
The astronaut boot's sole and base were crafted in two stages. Initially, a wooden sole was fashioned, and a clay structure was built for the base. This served as the foundation for creating a silicone cast and moulding a rubber boot in the second stage.
The fabric components were machine-sewn to form the boot's carcass overlay, meticulously hand-sewn into the rubber boot to ensure secure attachment.
While appearing briefly in a single shot, this sequence was pivotal in the film.


